
There is hardly any need to extol the benefits of having your own server. From storing and sharing your data to self-hosting useful web applications, a server is a versatile platform that can make your computing life easier. Opting for a network-attached storage (NAS) appliance that comes with pretty much everything you need and requires very little tinkering seems like a no-brainer.
But running your own server on a local network is not without drawbacks. To access the server from the outside world, you need to punch a hole in your network, which leads to a whole new set of problems you have to deal with. Plus, your Internet connection may or may not be up to scratch in terms of reliability and speed.
If you are only interested in running web-based applications, shared web hosting might look like a sensible option. Most providers have plans that include a web server, PHP, and a MySQL database – all configured and ready to go. Some providers even offer easy-to-use installers for popular web applications. However, ease of use comes with serious limitations. Can you Install PHP additional libraries? No. Can you run non-PHP applications? Forget about it. Some providers don't even offer SSH access.
A virtual private server (VPS) provides a middle ground between managing your own server and opting for shared web hosting. A VPS is a virtual Linux server system that you can manage yourself. Because you are the admin for your VPS, you have more control over it than you would with a basic web hosting arrangement. And, because the VPS is a virtual machine that shares the hardware with other VPS systems, it is much less expensive than leasing a dedicated server.
A VPS gives you a complete Linux server, without any of the drawbacks of having it on your own network. But that's not the only benefit. You can have a modest VPS instance for as little as a couple of euros or dollars a month. More importantly, you can create and discard VPS systems on demand. So you can easily and cheaply spin a VPS for testing and experimenting, or you can have several VPS instances for different workloads. Better still, you can have a beefier VPS configuration from a reputable provider for running mission-critical tools and applications. Of course, running a VPS means that the responsibility to keep your VPS instance secure and the data on it safe rests squarely on your shoulders. But that's a small price to pay for the sheer convenience and flexibility a VPS gives you. If you have no experience setting up a VPS, despair not: This article will get you up and running in no time.
First Steps
The very first step is to find a VPS provider and a VPS configuration that fits your needs. The good news is that there is a myriad of VPS providers to choose from, and they offer a seemingly infinite number of VPS configurations. While it may be tempting to go for the lowest price possible, it's better to do some research and opt for a reputable service instead. Most VPS providers offer a choice of different Linux distributions. For obvious reasons, Ubuntu or Debian is a sensible choice for a VPS in most situations (the rest of the instructions assume that your VPS is running Ubuntu). Most VPS providers offer a web-based administration interface that allows you to initiate your VPS instance and install a Linux distribution on it. Usually, you can also reboot the VPS and reinstall the system via the administration interface.
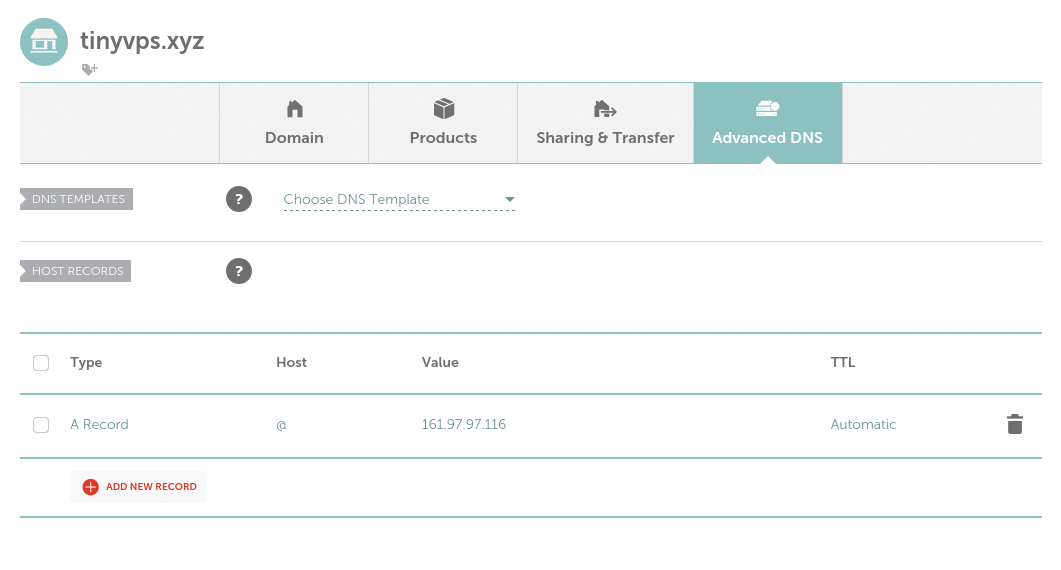
If you want your VPS to have its own domain name, the next step is to procure one. You can use a domain name registrar like Namecheap to register the desired domain name. When you have the VPS up and running, note its IP address: You'll need it when setting up an A Record through the domain registrar. To do this in Namecheap, log in and switch to the Domain List section. Click the Manage button, and switch to the Advances DNS section. Click Add new record, select A Record from the drop-down list, and configure the record so it looks similar to Figure 1. Once the record has been updated (it may take a while), you can reach the VPS by its domain name instead of the IP address.
Automate and Protect
At this point, you have a VPS up and running, and it has a domain name associated with it. But the VPS can't do much until you install the required software and specify a basic configuration. At the very least, you need to add a non-privileged user, add the user to sudoers, install a web server, configure a virtual host, and enable SSL.
Completing all these tasks is not particularly difficult, but it does require some manual work. It can quickly become a chore if you regularly spin new VPS instances and reset the existing ones. This is where the VPS Express package cobbled together by yours truly can come in rather handy. The package includes a Bash shell script that does the following:
- Updates software repositories and installs the required packages
- Sets up and configures a virtual host (an Apache configuration that basically redirects a domain name to the dedicated directory in the document root of the server)
- Enables SSL HTTP connections
- Sets up MariaDB
- Creates a new MariaDB user with administrative privileges
- Creates a MariaDB database
Run the script, and you have a ready-to-go VPS, running the Apache/MariaDB/PHP stack. The most straightforward way to run the script directly on the VPS is to use the following command as root:
curl -sSL https://raw.githubusercontent.com/dmpop/vps-express/main/vps-installer.sh | bash
However, if you'd prefer to study and modify the script before running it, clone the project's repository using the command:
git clone https://github.com/dmpop/vps-express.git
Note that the script is designed to work on Ubuntu, so if your VPS is running a different Linux distribution, you have to adjust the script before you run it.
Of course, you can extend the script to perform additional tasks, if needed. For example, if you want the script to automatically fetch the Adminer tool for working with popular database engines, you can add the following command to the script (replace the example values with the actual version number and document root):
wget https://github.com/vrana/adminer/releases/download/v4.8.1/adminer-4.8.1.php -O /var/www/html/hello.xyz/adminer.php
Next, you need to make the VPS instance more secure. Linux hardening is a complex topic that warrants a separate article, but as the bare minimum, you want to enable automatic upgrades as well as configure and enable the Fail2ban tool.
Enabling automatic upgrades ensures that your VPS runs the latest software that includes all security fixes. Enabling this feature on Ubuntu is a matter of installing the unattended-upgrades package and enabling it:
apt install unattended-upgrades
dpkg-reconfigure unattended-upgrades
The Fail2ban tool makes it possible to ban an IP address after a specified number of unsuccessful login attempts, which makes brute force attacks less effective. The VPS installer script installs Fail2ban automatically, so you only need to configure and enable the tool. First, create a new configuration file by copying the supplied template:
cp /etc/fail2ban/jail.conf /etc/fail2ban/jail.local
Open the new configuration file for editing using the command:
nano /etc/fail2ban/jail.local
Scroll down to the [sshd] section, and add the following options:
enabled = true
maxretry = 3
This enables Fail2ban for the incoming SSH connection and sets the number of unsuccessful login attempts to 3. Save the changes, and then enable and start the Fail2ban service:
systemctl enable fail2ban
systemctl start fail2ban
Run the systemctl status fail2ban command to check whether the service is up and running.
Safe Landing
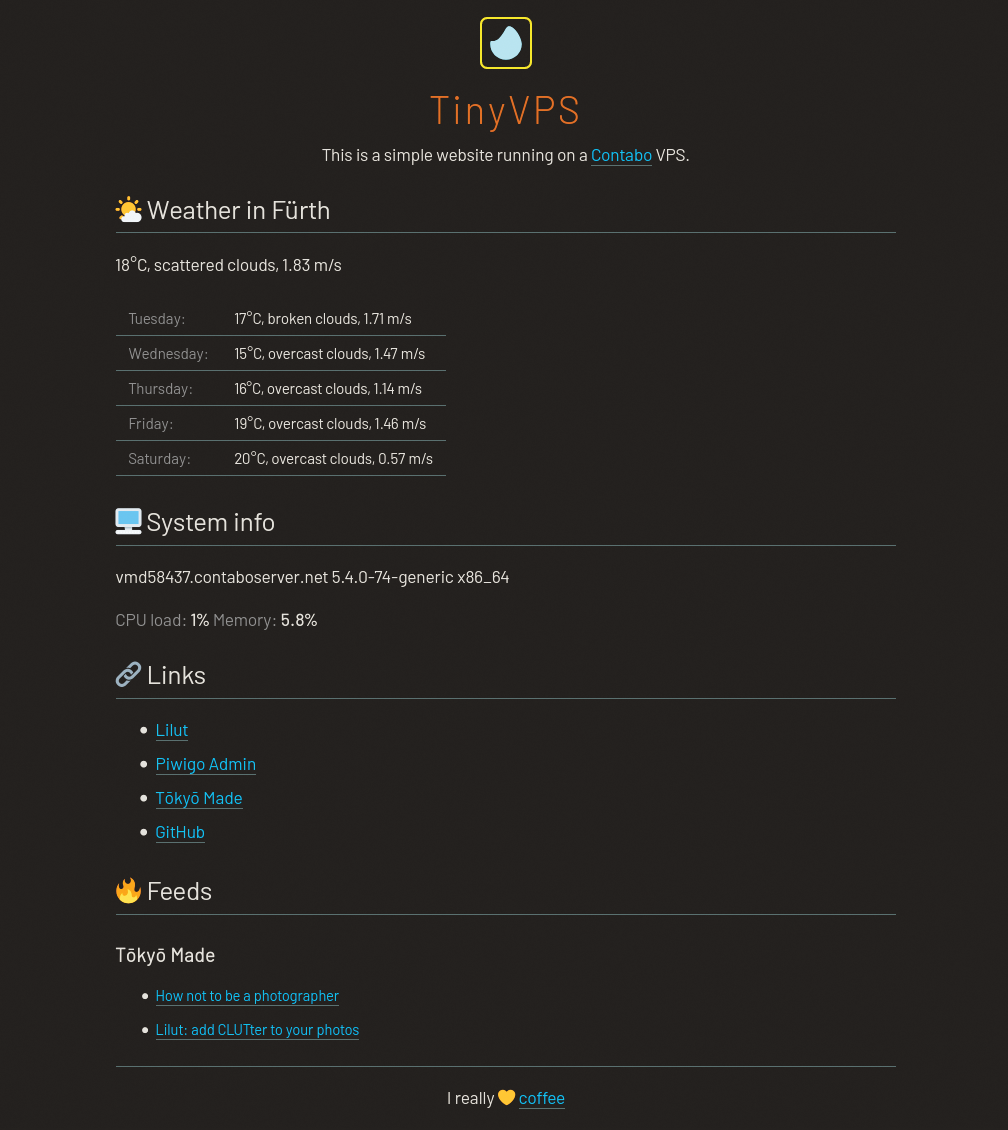
Whenever you point a browser to the domain name assigned to the VPS, you're greeted with the default Apache page. If you want to replace the default page with something more useful, you might want to give the landing page template that comes with VPS Express a try. Written in PHP, the landing page provides basic information about the VPS it's running on, a five-day weather forecast for the specified location, a section with user-defined links, and a feed section where you can add your favorite RSS feeds (Figure 2).
To configure the available settings, open the index.php file for editing and adjust the user-defined settings. Most of these settings are self-explanatory, so you shouldn't have problems figuring out what they do and how to configure them. To be able to use the weather forecast functionality, you need to obtain an OpenWeatherMap API key. Once you're done editing the settings, save the changes and upload the index.php file along with the fonts and css folders into the document root of the server.
Monitor Your VPS
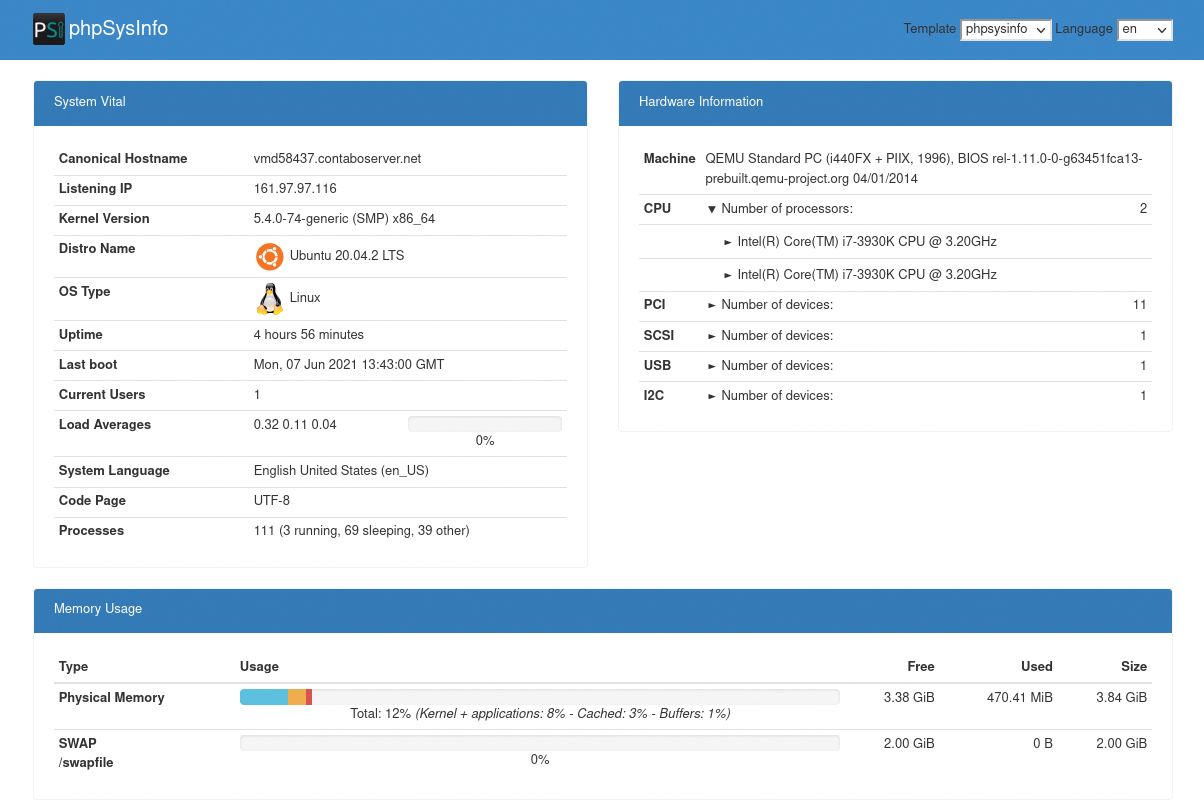
Since keeping the VPS running smoothly is solely your responsibility, it's a good idea to have a monitoring solution that makes it possible to track your VPS and its health. Since your VPS already has PHP, the most straightforward way to add monitoring capabilities to the VPS is to install phpSysInfo on it. The tool displays essential system information in an easy-to-understand manner. It requires virtually no configuration, and it can be deployed on your server in a matter of minutes.
Grab the latest release of the software from the project's website, unpack the downloaded archive, rename the config.php.new file in the resulting directory to config.php, and upload the entire phpsysinfo directory to the server. Then point the browser to http://hello.xyz/phpsysinfo (replace hello.xyz with the actual domain name of your VPS), and you should see phpSysInfo in all its beauty (Figure 3).
The default phpSysInfo configuration displays all key information, but you can easily add more data points by editing the config.php file. All options available in the file contain brief but informative descriptions, so enabling and configuring the desired entries is easy. For example, to enable one or several bundled plugins, edit the PLUGINS=false line as follows:
PLUGINS=PSStatus,SMART
If you are looking for something more powerful and flexible than phpSysInfo, then Ajenti is a perfect candidate for the job. Installing Ajenti is a matter of running the following commands:
sudo apt install software-properties-common
curl https://raw.githubusercontent.com/ajenti/ajenti/master/scripts/install.sh | sudo bash -s -
Once the installation has been completed, you can access Ajenti on port 8000 (e.g., http://hello.xyz:8000) and log in using an existing system user account. By default, Ajenti uses the HTTP protocol, so you might want to enable SSL right from the start. Assuming you've already enabled Let's Encrypt on the VPS, the first task is to create a so-called full keychain certificate file using the commands below (replace hello.xyz with the actual domain name):
/etc/letsencrypt/live/hello.xyz
cat privkey.pem fullchain.pem > fullkeychain.pem
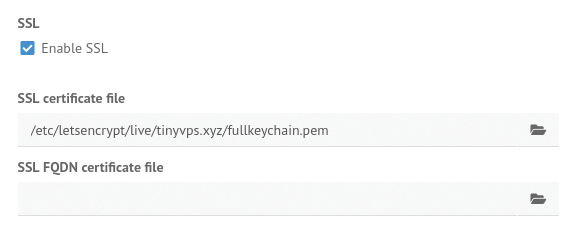
Next, switch to the Settings section in the Ajenti dashboard, activate the Enable SSL option, and specify the path to the fullkeychain.pem file in the SSL certificate file field (Figure 4). The path may appear as follows:
/etc/letsencrypt/live/hello.xyz/fullkeychain.pem
Click Save to apply changes, and you should be able to access Ajenti using the HTTPS protocol (e.g., https://hello.xyz:8000).
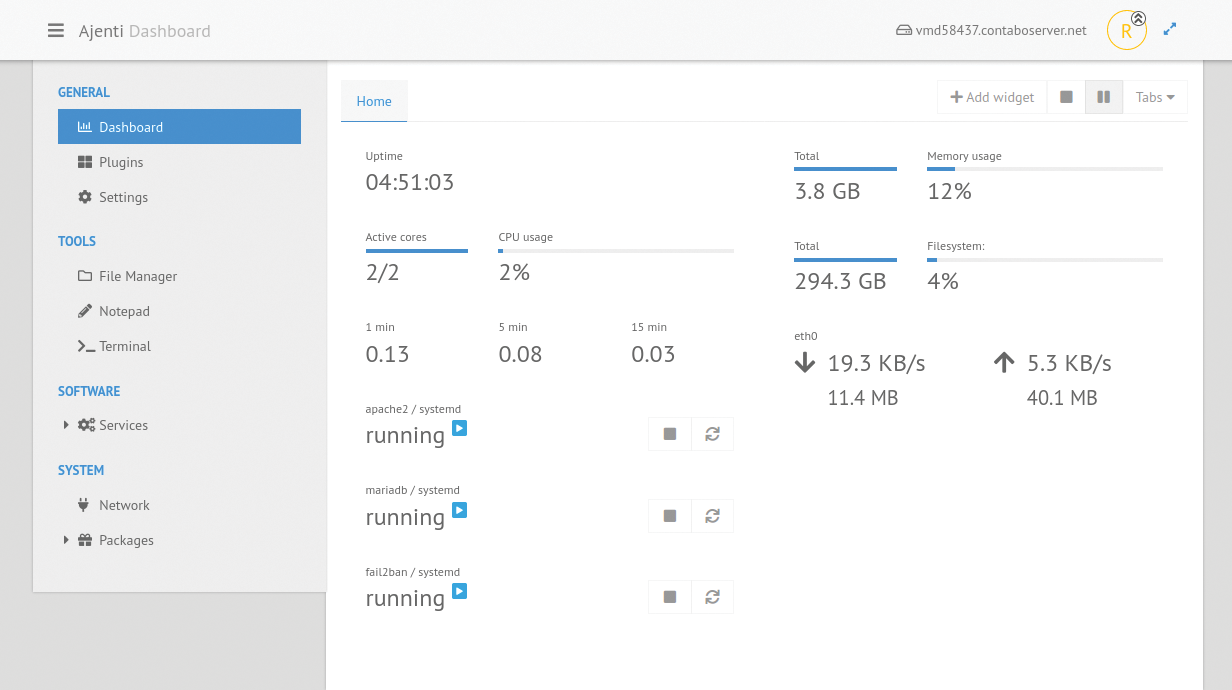
You can populate the Dashboard section with widgets that monitor various aspects on the VPS, including disk space and memory utilization, CPU usage, traffic statistics, and more (Figure 5). Adding a widget is easy. To add, for example, a widget for monitoring and managing a specific service, click the Add widget button and select Service. In the added widget, click the Wrench icon, select systemd from the Manager drop-down list, and select the desired service (e.g., apache2) from the Service drop-down list. Once configured, the widget displays the current status of the server and lets you stop and restart it. For a better overview, you can arrange widgets by dragging them with the mouse and grouping them into tabs.
Besides widgets, Ajenti offers several other benefits. The File Manager module makes it possible to traverse directories on your VPS and work with files. You can move files and directories, delete them, and create new ones. It's also possible to edit text files using the built-in text editor, which can be useful when you need to edit a configuration file.
As the name suggests, the Terminal module provides terminal access to the VPS right from Ajenti, while the Services module gives you access to all system services. Finally, the Plugins module can be used to extend Ajenti's functionality by installing additional plugins.
Wrap-Up
Like everything else in life, running your own VPS instance has its advantages and drawbacks. You need to take proper care of securing your VPS, and the burden of keeping the server running smoothly is all yours. But if you're looking for an inexpensive way to have a Linux machine that's fully under your control, you can do much worse than opting for a VPS.
This article originally appeared in Linux Magazine and is reprinted here with permission.
Want to read more? Check out the latest edition of Linux Magazine.


Comments