
GNU/Linux treats everything as a file. For this reason, learning file management commands should be among your first priorities. These commands are easy to remember because their names are usually abbreviations of their actions – for example, mv for move and ls for list – but their options can take time to learn.
Basically, file management commands fall into three categories: directory and file movement, navigation and editing, and compression. Commands in all three categories are typically more powerful (and potentially more dangerous) than their desktop equivalents, thanks mainly to file globbing, or the use of standard patterns to refer to multiple files.
Moving and Editing Directories and Files
The most basic command for moving directories and files is cp. Its structure is simple: cp <options> <filesourcefile> <target>. By default, cp overwrites any files of the same name in the target directory, but you can be cautious and use the ‑b option to back up any files that are overwritten or the ‑u option to overwrite only files that are newer than the ones in the target directory (Figure 1).

Also, you can add ‑ ‑preserve=mode to choose to preserve file attributes, such as owner or timestamp, or ‑ ‑no‑preserve=mode to have them changed in the files’ new location. Whether or not you preserve attributes is especially important when you are logged in as root and moving around files owned by another user – say, for a backup of the /home directory.
Sometimes, you might not want to waste hard drive space on multiple copies of the same file, in which case you might prefer to use ln ‑s file link to create a symbolic link, or pointer, to the original file, which takes up much less space (Figure 2). Later, if you copy these symbolic links to a backup, you can use cp ‑L to ensure that the original file, not the link, is used.

Alternatively, you might prefer to move a file with mv, which takes many of the same options as cp. Also, you can use mv to rename a file, giving it the same directory path but a different final name (Figure 3). For example, to change the name of the file garden.png while keeping it in the same directory, you could use mv ./garden.png ./sun‑yat‑sen‑gardens.png.

As you copy or move files, you might want to create a new directory with mkdir. Although this is a relatively straightforward command, you can fine-tune it with ‑ ‑mode=octal‑permissions to set permissions for the new directory or create the directories immediately above it by adding the ‑p (parent) option.
To delete, use rm (remove) for files and directories and rmdir for directories. Don’t forget that, unlike the desktop, the Bash shell has no Trash folder. The closest you can get is to create a special folder and move files to it instead of using rm or rmdir.
By default, rm works only on files. To delete directories with it, you have to use the ‑r option. As you might imagine, rm ‑r can remove key system files when used thoughtlessly; thus, some users prefer to add ‑ ‑preserve‑root when running the command anywhere near the root directory. In comparison, rmdir is a much safer option, because it works only on empty directories (Figure 4).

A completely different approach to file management is taken by dd, an old Unix utility that copies bytes or blocks rather than files. Used mainly by administrators, dd has a non-standard syntax. Briefly, dd can be used for such tasks as creating an ISO image from a CD/DVD, wiping a disk by filling it with random data, and duplicating a partition or master boot record. Just remember to construct your dd command carefully and double-check it. Even more than rm, the dd command can be hazardous to your system if you are inattentive.
Navigating and Editing Directories and Files
You probably already know that you move around the directory tree with the command cd <directory> – a command so simple that it has no options. You might not know, however, that cd has several shortcuts: cd .. moves to the directory immediately above the current one; cd ‑ returns you to the previous directory; and cd ~ returns you to your home directory (Figure 5). Combined with the command history in a virtual terminal, these shortcuts are enough to give you the equivalent of the back and forward buttons in a web browser.

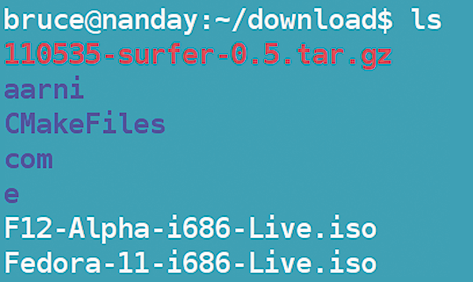
Once you are in a directory, use ls to view the contents. In many distributions, you will find that ls is actually an alias of ls ‑ ‑color, which displays different types of files in different colors. Sometimes, it is an alias of ls ‑ ‑color ‑ ‑classify, which adds the use of symbols such as / to indicate a directory or * to indicate an executable file (Figure 6).
For many users, these options are more than enough. However, sooner or later, you will likely need the ‑a option, which displays hidden files – those whose names start with a period. To pinpoint a file, you might use ‑l to display file attributes. To help sort files with ls, various options let you sort by size (‑s), time (‑t), or extension (‑X).
All this information can easily occupy more lines than your terminal window displays, so you might want to pipe the command through less (ls | less) so that only one screenful of information is visible at a time. If you are trying to identify a file, file is a supplement to ls, identifying the type of file (Figure 7). If you have symbolic links, you can add the ‑L option so that you can identify the type of the original file. Also, you can use ‑z to view the contents of compressed files (more on this later).

Yet another tool for tracking down files is find. The find command takes so many options that I list only some of the most important ones in Table 1.
| Option | Action |
|---|---|
‑amin <min>/‑atime <days> |
Minutes/days since a file was accessed. |
‑cmin <min>/‑ctime <days> |
Minutes/days since a file’s status was changed. |
‑mmin <min>/‑mtime <days> |
Minutes/days since a file was modified. |
‑group <group> |
Files that belong to a particular user group. |
‑user <user> |
Files that belong to a particular user. |
‑maxdepth <number> |
The maximum level of sub-directories in which to search. |
‑mindepth <number> |
The minimum level of sub-directories in which to search. |
‑perm <permissions> |
Designated permissions. |
*The +n/n/-n, where n is exactly n min/days, +n is >n min/days, and -n is <n min/days (a day = 24 hours). Therefore, ‑mtime +2 would specify files modified at least 2*24 hours ago (i.e., at least three days ago because of rounding). See the man page for more information.
When you have located a file, you can use the touch command to edit its timestamps. For example, the command
touch ‑a grocery list.txt 1410311200.00
would change the access time to noon on October 31, 2014, and you can use the same date format after ‑m to change the last modification time. Similarly, ‑t=<YYMMDD.ss> changes the date and the time that the file was created. Also note that the time starts with the last two digits of the year and ends with the seconds.
Compressing and Archiving
Compression is less essential now than it was in the days of 100MB hard drives, but it continues to be important for creating backups or sending files as email attachments. The Bash shell includes four commands for compression: the original tar, gzip, bzip2, and – more rarely – cpio.
When you exchange files with users of other operating systems, use gzip so they can open the archive. Gzip’s basic use is straightforward, with a list of files following the command, but you can use a variety of options to control what happens.
To set the amount of compression, you can use the parameter ‑ ‑best <number>, or to set the speed of compression, you can use ‑ ‑fastest <number>. Both are measured on a scale of 1 to 9. Note that you need to use the ‑N option to preserve the original files; otherwise, they will be deleted when the archive is created.
To work with files in a gzip archive, you can use several utilities:
zcatdisplays files in a gzip archive.zcmpcompares files in a gzip archive.zdifflists differences between files in a gzip archive.zgrep,zegrep, andzfgrepsearch for text patterns in gzip-archived files.
One especially useful utility is gunzip, which amounts to an alias for gzip because it uses most of the same options. But, if you can’t be bothered learning another command, you can simply use the command gzip ‑d.
By contrast, the bzip2 command produces archives that are 10 to 20 percent smaller than those produced by gunzip. But, although bzip2 and gzip serve similar purposes, bzip’s options are considerably different. For one thing, you have to specify sub-directories, because bzip2 lacks an ‑r option. For another, you use the ‑z option to compress files and ‑d to decompress. To keep the original files after the archive is created, use the ‑k option.
Like gzip, bzip2 has some related utilities for working with its archives:
bzipcatdisplays the contents of a file in an archive, with the same options as thecatcommand.bziprecoverhelps recover damaged archived files.bunzip2decompresses files.
The differences between gzip and bzip2 can be hard to remember, so many users prefer to rely on the tar command. The tar command not only has the advantage of having options to use gzip and gunzip (‑z) or bzip2 (‑j), but it also offers far more control over exactly how you compress files.
In fact, tar's options run into the dozens – too many to detail here. For example, you can use ‑ ‑exclude <file> to exclude a file and ‑p to preserve the permissions of a file. If you want to preserve a directory structure, use ‑p. To be safe when decompressing, use ‑k to prevent any accidental overwriting of files.
The tar command also includes its own built-in utilities in many cases. To add one archive to another, use the format
tar --append <tarfile1> <tarfile2>
To update an archive with newer versions of files with the same name, use the ‑u option, or to compare the files in an archive with other files, use the format:
tar --compares <tarfile files>
The fourth compression command, cpio, has fallen out of favor in recent years, probably because its format is non-standard. For example, to create an archive with cpio, you have to pipe ls through it and specify the file for output:
ls | cpio ‑o > <outputfile.cpio>
That said, cpio has even more options than tar, including such powerful alternatives as the ability to archive an entire directory tree and create archives in multiple formats (of which TAR is the only one that is widely used), as well as numerous options to view and edit already-archived files. However, unless you are a system administrator or an old Unix hand, chances are you will rarely see cpio used.
Extending File Management with Globbing
One reason shell commands are so powerful is that they can work with multiple files. With many commands, the easiest way to work with multiple files by entering a space-delimited list directly after the command. However, the most concise and efficient way to handle multiple files is through file globbing.
File globbing refers to the use of regular expressions (often abbreviated to regex), pattern matching, metacharacters, or wildcards. The terms are not quite synonymous, although they are mostly used as if they were. Whatever term you use, it refers to a string of characters that can stand for many different strings.
The most widely used glob in the Bash shell is the asterisk (*), which stands for any number of unknown characters. This glob is especially useful when you want to find files that share the same extension. For instance, the command ls *.png lists all the PNG graphics in the current directory.
By contrast, a question mark (?) stands for any single character. If you enter the command ls ca?.png, the list of matches will include the files cat.png and cab.png but not the file card.png, which contains two characters instead of one after the ca.
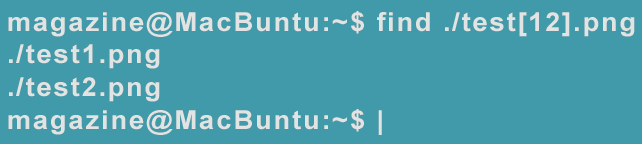
From these simple beginnings, globs can quickly become more elaborate. To specify specific characters, you can use square brackets, so that test[12].png locates files test1.png and test2.png, but not test3.png (Figure 8). Also, you can specify a search for a regex at the start (^) or the end ($) of a line. Similarly, you can search at the start of a word with \< or the end of a word with \> – and these are simply a few common possibilities. Using globs is an art form, and experts rightly pride themselves on their ability to construct elaborate and elegant globs.
But what if you want to work with a metacharacter? Then you put a backslash (\) in front of it. For instance, \\ indicates that you are looking for a backslash, not a directory. The backslash is known as an escape character, and it signals that the command should read what follows literally, instead of as a glob.
Globs can be especially useful when you want a selected list from a directory full of files or when you are using one of the grep commands to find content inside a file. However, you must be careful about using globs with commands like rm or mv that change or rearrange the content of your hard drive. Otherwise, a command can have disastrous consequences. To be safe, consider using a newly constructed glob with the innocuous ls command, so you can see what files it might affect.
Learning that Pays
File management commands have a long history in Bash. During the course of their development, they have accumulated options the way ships accumulate barnacles – constantly and apparently haphazardly.
However, often, the options are simpler than they first appear. For example, you can be fairly certain that most file management commands will use ‑r to include sub-directories and their contents and ‑v to print a detailed description of what they are doing to the terminal. Similarly, to force a command to work, regardless of consequences, you generally use ‑f. Adding the ‑i option, however, means that every action needs to be confirmed by you before it happens. Even with such hints, these commands can take a long time to master.
In fact, for basic actions, they might offer little more than a graphical file manager can. But, if you try to do something more intricate – such as specifying how symbolic links are going to be treated or excluding a file from an archive – the file management tools easily outclass their desktop equivalents. If you learn some of the less straightforward options for these commands, you’ll soon understand why many experts prefer to use the command line for file management over anything that the desktop has to offer.
This article originally appeared in the Linux Shell Handbook and is reprinted here with permission.


Comments