
Linux systems can be compromised by the installation of hidden processes visible only from the kernel. Unhide is a generic name for a series of related commands designed to detect such processes through a toolkit of over 30 tests, most of which involve examining and comparing various elements of the system. Of all the versions, the one for Linux is by far the most developed. Originally, the Linux version was called unhide‑linux, but in Linux repositories, it is generally named simply unhide.
The unhide command works by scanning for inconsistencies within the parts of a Linux operating system that allow users to view what the kernel and related processes are doing. Many system elements compare /proc, the pseudo filesystem that displays information about the running system, and /bin/ps, which contains all processes currently running on the system. Others compare /bin/ps with the system calls between the Linux kernel and /proc, which contains data about processes. Another compares the structure of process IDs (PIDs) with the conventional structure and size of other PIDs.
These sources of information operate largely independently of each other, so differences between them may reveal an illegal intrusion. Most of them are not used by ordinary accounts, and even root should generally only view them. Consequently, unhide provides a safe glimpse into these processes that can help admins decide what future steps to take. Unusually for a Linux package, unhide consists of static dependencies, because if hidden processes exist, by definition, they cannot be detected by regular system resources. However, unhide does not take steps to remove intrusions, and any hits in the results should be checked before any response is made.
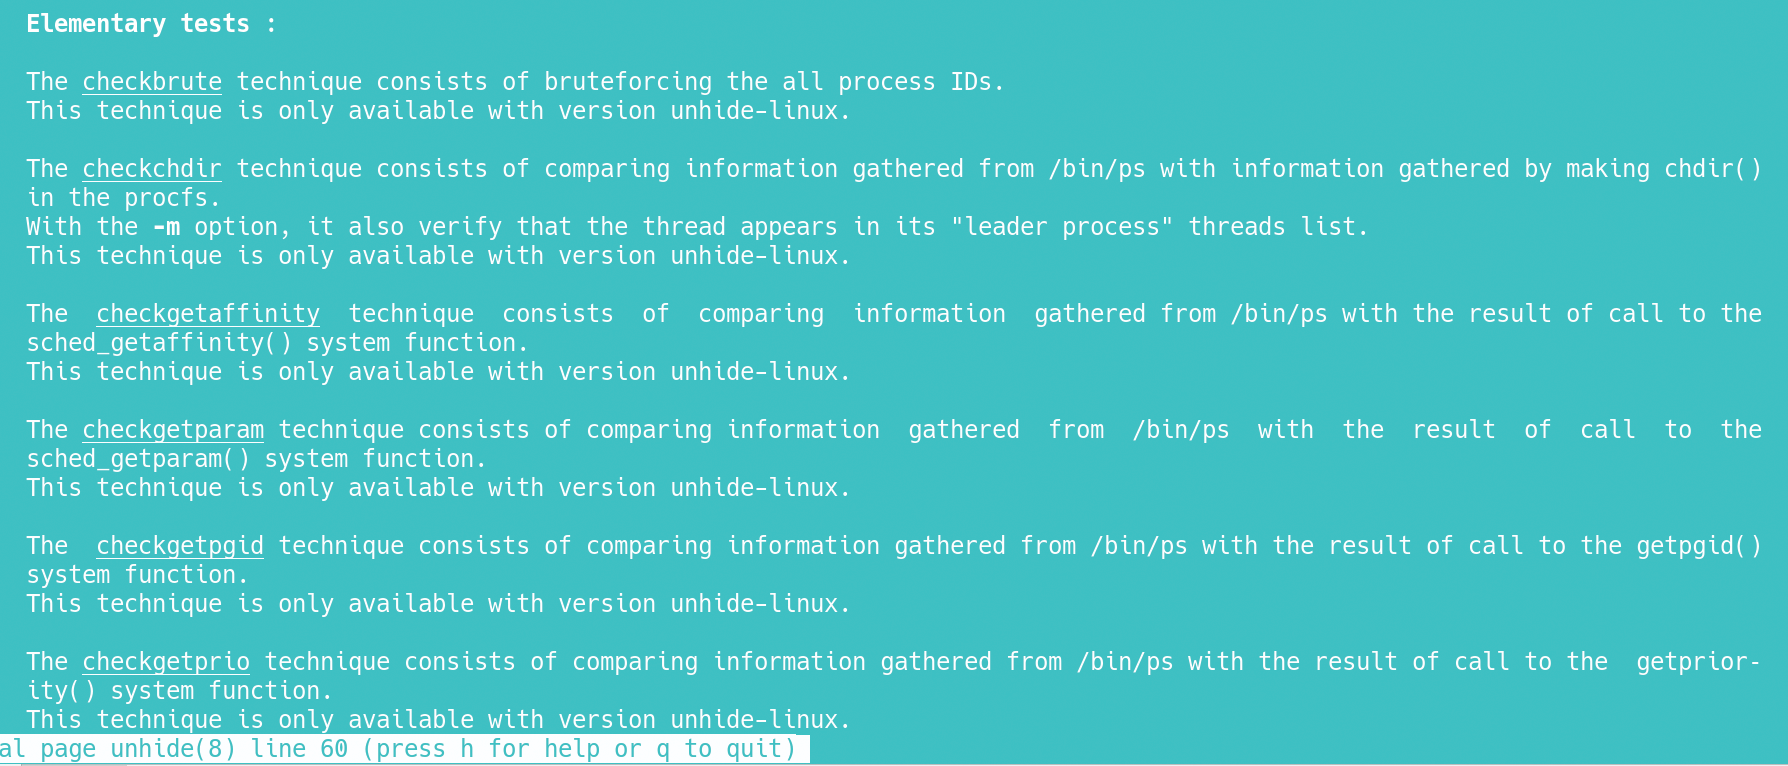
You will find unhide as a standard package in the repositories of most distributions, and it may even be installed by default or as part of another security utility. Running the bare command gives a list of elementary tests, which are individual tests; you will find these tests described briefly in the man page (Figure 1).
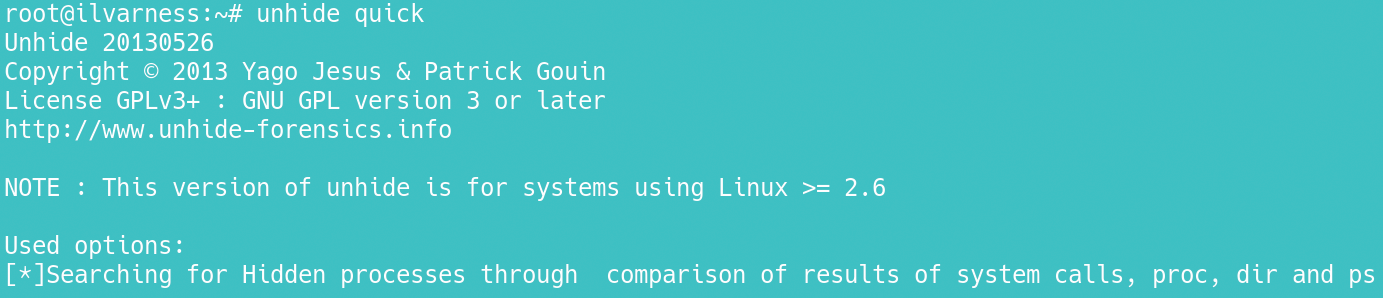
Running elementary tests can give fast results, but, unless you have a specific suspicion, you probably will choose to run a standard test (a set of related elementary tests). A standard test takes longer, but it gives a more thorough investigation of the system. The structure (Figure 2) for running any test is:
unhide TEST OPTIONS
The Standard Tests
The elementary tests listed on unhide’s man page are grouped into seven standard tests:
brute: Brute-forces or runs all techniques. This process can take 5-10 minutes, even on a recent computer, but it is extremely thorough.proc: Compares/procwith the output of/bin/ps.procfs: Compares information gathered from/bin/pswith information gathered byprocfs.procall: Combines theprocandprocfstechniques.quick: Combines theproc,procfs, andsystechniques, and is some 20 times faster than running the three separately. It may give false positives due to its speed. However, if a positive result is found, another test should be run to confirm it.reverse: Checks that all threads seen bypsare also seen inprocfsand system calls. Its purpose is to verify that a rootkit has not disabled a security tool and forcedpsto show a false process.sys: Compares/bin/pswith system calls.
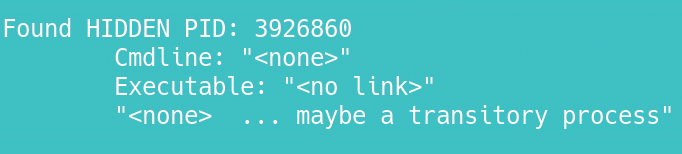
The difference between elementary and standard tests is in the details. All tests have a similar structure. They report when they move from one stage to another, and they list any positive results. If no positive results are found, the command exits with no message. If a hidden process is found, the output gives a PID, whether it runs from the commmand line (which makes it potentially more dangerous) or whether it is executable (more dangerous still), as well as unhide’s diagnosis of the process (Figure 3). Note that some transitory processes may be hidden and can be identified as harmless with online research.
Options
Options are placed at the end of the command. Most tests will take most options, except where noted. To test thoroughly, you should run all possible options. The options include:
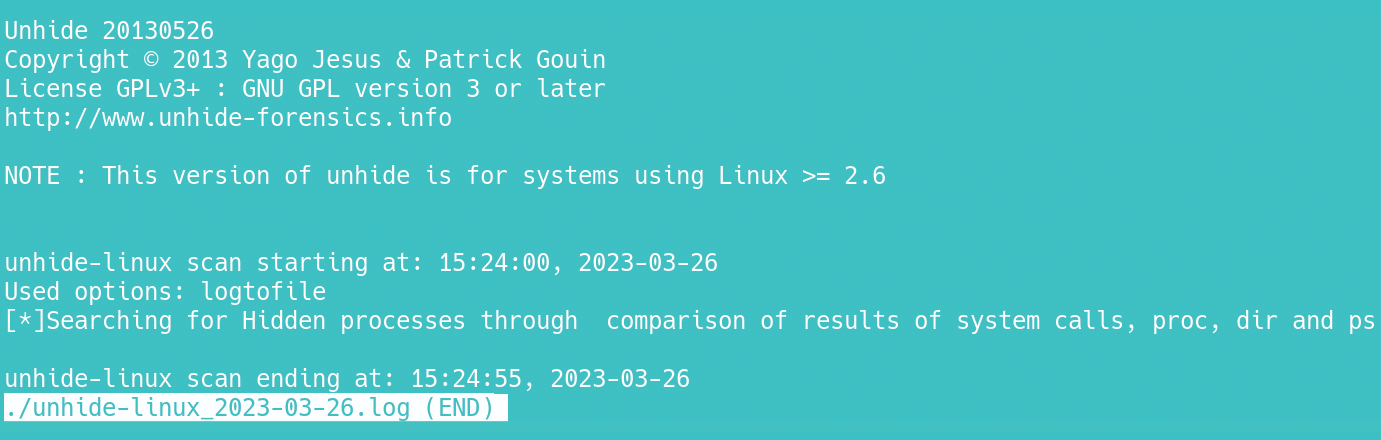
-d: In abrutetest, this option automates what you would want to do manually. That is, if you receive positive results, the first thing you should do is rerun the test, which is precisely what‑ddoes. Should both runs of the test give the same result, you can be reasonably confident of the results. But if the results differ, you should run other standard tests for a clearer picture.‑f: Writes a logfile namedunhide‑linux_YYYY‑MM‑DD3, showing the time and structure of the test run, as well as any results to the current directory. If you are trying to deal with hidden files after runningunhide, you may want a printout of this log to keep track of your investigation (Figure 4).‑m: Forprocfs,procall,checkopendir, andcheckchdir, this option runs in verbose mode and runs additional, unspecified tests, possibly running all four of these standard tests, although documentation is lacking.‑v: Gives more detailed output (verbose). These details are not displayed by default to decrease the time tests take to run, but may be useful when a test is rerun. When the‑voption is set, a test will scan results for additional information, but may not find any. Not all tests will display additional information with‑v, but running‑dand‑vtogether may sometimes be useful.
Other Versions
When working with unhide, there are several other variants of the command you might want to explore:
unhide‑tcp: Identifies unlisted TCP/UDP ports that are listening, but not listed. The structure and commands are somewhat similar to those ofunhide.unhide‑posix: A version ofunhidefor Unix-like systems other than Linux, it is not as thorough as the Linux version.unhide‑gui: A recent desktop version ofunhide, it has only appeared in Debian Unstable and Testing, but I could not get it to run while researching this article, nor find an image. Presumably,unhide‑guiwill become usable in Debian 12, the next general release.
In addition, you will find unhide bundled in other security tools such as Rootkit Hunter (rkhunter).
Working with Results
When running unhide, remember that the command is not always definitive. When you get positive results, you should confirm them by rerunning tests and running additional ones, as well as using some of the command options. Take notice, too, of the tentative diagnosis in the test, and check for an increase in traffic on the system. You may be able to identify the PID by a search if it is a legitimate one.
If you conclude that a machine has been cracked, isolate it immediately. Do not attempt to examine possible intrusions directly from the machine, because you will not get reliable results and only waste your time. Instead, boot from a Live DVD to examine the compromised machine. Unfortunately, this is likely to be a slow process, involving long research sessions online. In the end, the fastest way to recover is to reinstall a recent backup. In the end, unhide is an alert, not a solution – although an analysis of one compromised machine might help you prepare a new machine more rigorously.
This article originally appeared in Cool Linux Hacks and is reprinted here with permission.
Want to read more? Check out the latest edition of Cool Linux Hacks.


Comments